Tuesday, August 18, 2009

More Shedonism

The shed is almost done with most of the interior fittings in place. The doors have been readied and Dad has painted both sides with the weatherproofing paint. I've been having trouble getting a matching set of hinges to the pair that I have in possession. I'll have to work something out....

Full frontal shot. My lawnmower will be happy to spend Winter indoors. It told me so!!!!

From the side

Shingled roof

Dedicated storage for my shop vac

Dedicated shelf for my fuel canisters

I used the wall cavity on one side for my garden waste bags

Monday, August 17, 2009

Trailer Trash - Part One

I'm not sure at what point I had decided that I needed a trailer to tow behind my bike. Maybe it was when Layla finally graduated to a real cycle that enabled us to start cycling to progressively greater distances. Anyways what I need (want), I cannot normally afford, so I gravitate towards making stuff. However with the very little time that I have being divided between taking the girls cycling and swimming and the rest in construction..... the prospect of building that trailer seems further and further away.

Till yesterday.

I found this left out for garbage collection......

A fully functional child carrier made by our very own "Chariot Carriers" in Alberta. Oh Joy!!!

It's an amazing piece of tech with cast plastic wheels shod with street tyres and with fully sealed roller bearings attached to a solid axle. The frame is aluminum so it will make for easy working. The only problem is with the hitch that attaches to the cycle, but that will be rectified.

I ripped off the protective shell and it is now laid bare for hacking.

I plan to make the trailer look like the Radio Flyer Wagons.


Tuesday, August 11, 2009

Shedonism

This summer I decided to build a smaller auxiliary shed for my Lawn Mower and garden tools. It would be a lean-to against the shed that I had built last summer. Dad and I poured the concrete pad a couple of weeks ago and while the concrete was wet, we set a small garden plaque into the pour for a touch of whimsy.

We chose to 'Grow Giggles' as we will get a lot of Free Laughs when people see the state of my garden!!!


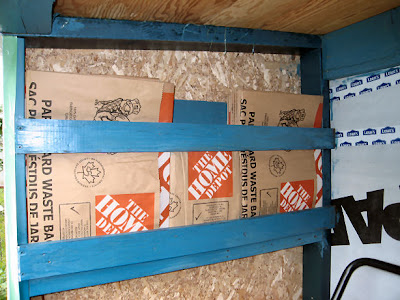
Yesterday, I built up the frame out of balance 2x4' that I had around the place. That's not bluwood you see, but regular and PT lumber that Dad coated with a coat of Weatherproofing stain that was sold as a mis-tint at the Re-Store.

The plan is that the vacuum cleaner will go on a shelf on the right, below which will be stored my off-season tires. On the Left will be the Lawn Mower, above which on a small shelf will stand my fuel for my gas powered equipment and above that will rest my ladder on two hooks.

I will use one of the in wall cavities to hold the lawn waste bags. I have not as yet decided what I will do with the others. All of my garden implements will hang from the two doors, that we will start building tomorrow.

Curb Appeal - Part 4

Not much progress really, but what does not seem like a lot, actually took three whole days to complete. I wanted the front porch to be free of any visible fastening system and this is what took all of the time. I used Simpson Strong-Tie Deck Board Tie (DBT1Z) to hold the boards in place. The system took a longer time that the traditional method of fastening the boards from the surface down. The results though are quite different. There will be no wear or splintering that is normally evident when screws are driven from the top.

Still a long way to go.

Related Posts with Thumbnails